Infographics are one of the main components of visual marketing. Many promoters compete to create and sell them, but you will probably not see a great infographic very often.
It’ll be a challenging task to create and bring every chart together. Begin with collecting useful data, place it in a high-quality and excellent template, upload it to the right platform, and then start promoting it.
I infographic design aspect is divided into two parts: theoretical and practical. Without the other, you can’t get one.
The entire method of constructing an information graph can seem complicated, but only the essential steps and specifics need to be taken into consideration. Today, however, I want to get a little deeper to see what a social media marketer can do to promote social media content.
How should I post it, and where will I share it? How to use social media to promote and get the best out of infographics?
Let’s dive in.
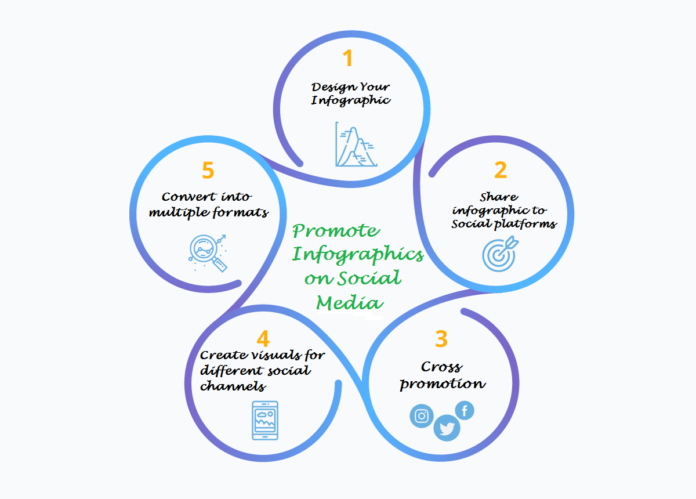
1. Design Your Infographic
First of all, you will understand the infographic design.
The vertical design is a robust phenomenon today because we move from top to bottom, not from left to right or left (except if you are a Tinder user). Facebook has a vertical newsfeed. Vertical Snapchat images are the option, and that’s a reason most infographics are vertically oriented.
Therefore, the first step to encourage is to learn, can social media sites allow you to upload large vertical pictures.
2. Share infographic to Social platforms
Pinterest is the most popular social network with prominent vertical photos. When I post an infographic on Pinterest, I figured that it gets much attention and fan following.
In fact, fans and followers share it on multiple social platforms and websites.
When you design and share an infographic on your website or blog, you should also share it to Pinterest. To get more publicity and dedication, I suggest you upload it natively.
When downloading the infographic, make sure you click the Edit button to attach a link to a blog post or web page. When the users click on the chart, they’ll be taken to your website.
For example, we designed an infographic on a topic Bluehost , which includes a blog post, but also with a link to its homepage on Pinterest.
And did you know that you could promote it on SlideShare, too? Many people think of it only as a presentation network, but you can also upload infographics PDF versions.
You can upload an infographic the same way you can upload a document. Please make sure you have a .pdf format.
You can share your infographic from SlideShare to anywhere you want. Therefore, you get an embed code from SlideShare, so that you don’t have to use your own website space.
3. Cross-promotion
Cross-promotion, I call it. Who said we could share social media blog posts? What if you started sharing your content on social media on other websites?
Go to your SlideShare account and click on the infographic you want to share. Click the sharing button and open it. Let’s say that on Twitter, you want to share it. Click the Twitter button to open a new Twitter tab. Make sure you are logged in with the right user to share this content. Then press the button Tweet.
This is how easy it is to share a piece of SlideShare material. Sharing through this approach will help, when you try to build a follow-up on that forum, rather than directly to your website.
On Pinterest, it opens in a pop-up when you click on an infographic that you want to share. When you click ‘Send,’ you can post your infographic pin on Twitter, Facebook, or even Messager. Or you can copy a short link and paste it anywhere you want.
Many social media managers forget that different content from various social media platforms can be easily shared. That’s what you can do with Instagram posts as well. It can allow you to attract viewers to follow you in several ways.
4. Create visuals for different social channels
However, what if you want to post an infographic on Twitter or Facebook? Would not every social network want its users to build native content and never leave the site? Yes.
And I found that I get more attention when I post native content on Facebook than when I post a visual with a link. Why? Rather than clicking on Facebook, users usually click on an external link.
You may then create various views for various social media sites and connect to the original infographic. This is better on uploading on a Facebook 800 x 8000-pixel infographic. Because even if Facebook creates a scroll-based newsfeed and vertical behavior, their content is more horizontal.
And you don’t want to upload an infographic, so people can’t see the content.
So, advertise that you have produced an infographic for them, and you need to click on the link to see the whole thing. Yet ask followers to comment on Facebook. In this way, Facebook will enhance your content as people comment on it.
5. Convert into multiple formats
How can you repost an infographic again so that you can receive more attention? Create a piece of your infographic, save it as a .jpeg or .png (but be sure you are in the correct size), and upload it to your preferred social networks.
In this way, you transform the large part of the content into a small infographic, which will engage the users.
Conclusion
It would help if you let people know about it; it is not enough to create a fantastic infographic. At least, if you want to get results from your content marketing and infographic. You then need it to share on a social media platform and make an aware audience about it.
You are using social media intelligently to speak to your audience and encourage it in several and creative ways.
